


A huge thank you to all paid subscribers and many thanks also to Peter, who bought me a coffee. Taming the Trunk is 100% reader supported, no ads or commission links and your support is really appreciated.
Newsletter housekeeping: The latest version for PC & Mac is 11.41.9. You can grab it from the download page. The latest mobile version is 11.41.3.
Something all you taggers have been waiting for. A brand new tag kingdom has arrived in Evernote, making it easier to manage and work with tags.
Here we go. Sorry, this could be a long one!
This is rolling out slowly, maybe over a couple of weeks, so if you don’t have it right now, you will eventually. Just make sure you’re on the latest version and now and then do a log out and back in again to see if it kicks things into motion.
What is an Evernote tag?
A quick explainer for folks who haven’t used tags before.
Think of tags as a label. You can add one or more of them to a note and then filter your notes by certain tags to see what you want.
For example. You could have the tags PhoneBill, 2025 and 2026.
A phone bill you store in Evernote for this month would be tagged PhoneBill and 2026.
You can then filter all your notes by the tags PhoneBill and 2025 or 2026 and see all the phone bills for that year.
If you apply this organisation to all your bills, you’ll be able to filter by 2025 and see all your bills for that year. Or filter by PhoneBill and see all your phone bills for every year.
Very powerful.
The main drawbacks of using tags are that you can easily end up with a lot of tags to manage, and it's one more job to tag all your notes correctly.
If you forget to tag, the whole system collapses.
Some folks are taggers, others just stick stuff in notebooks and use search.
What type of Evernoter are you? Tagger or Notebooker?
The new Evernote Tag Kingdom
Here’s a brand new and much easier way to manage your tags.
When you click tags in the left-hand sidebar, you’ll see the new tag kingdom.
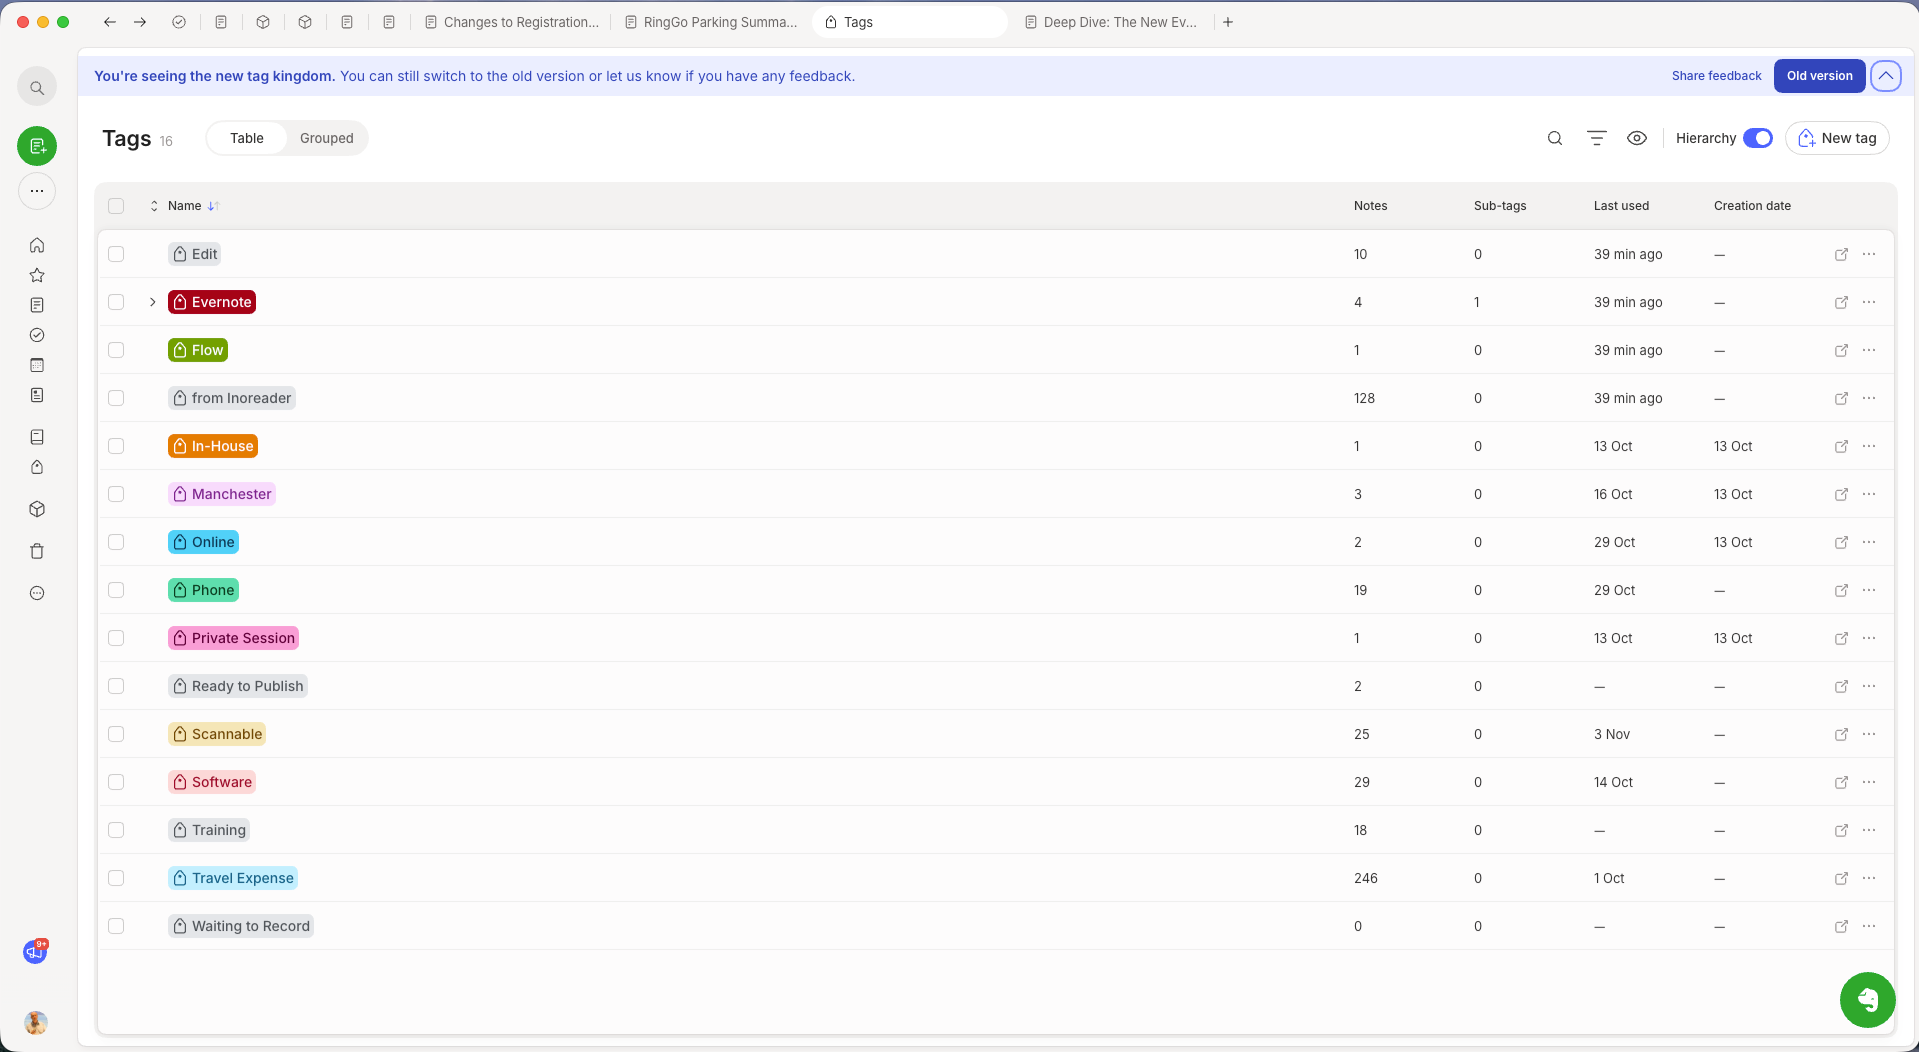
Nice and colourful. We’ll talk more about colours later.
Right now, there’s a banner at the top so you can switch back to the old view. I recommend getting used to the new look, as the old one will go away.
At the top left, you can see an option for Table and Grouped view. We’ll do groups later, but the table view is the default and what you see in the screenshot above. It’s basically a list of all your tags, including nested ones.
You can expand and collapse your nests of tags by using the little icon to the left of Name in the table header.
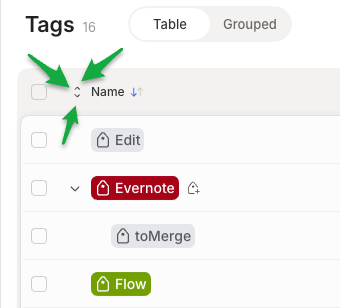
This will quickly open and close all the nests of tags.
Another thing you can do is nest tags by dragging them around. It really speeds up creating nests of tags.
We also have a little Hierarchy toggle at the top right of the table view that removes the nested view so all tags show in a list. You don’t see the relationship, the view is pretty much flat.

In the table view, you can also see how many notes have the tag, how many sub-tags are attached to the tag, the last time the tag was used and the tag creation date.

A quick note about last used and creation dates. Evernote never used to collect this information, so you’ll only see data from 7th October 2026, which is when they started recording these dates.
In the screenshot above, you can see a dash under creation date because I created that tag years ago.
We also have a little eye or view icon that lets us select the columns we see in the table.
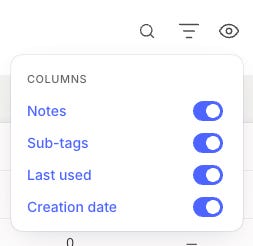
If you’re not bothered about seeing the creation date, you can hide the column.
The columns in the table view are also sortable, so you can switch from A-Z to Z-A and sort by number of notes, which is a quick way to find tags that have no notes attached to them.
Searching for tags in Evernote
There’s also a nice search box at the top where you can search for tags.

If you have a lot of tags or more tags that fit on the page, you can search for a tag, select it, search for another tag, select it and so on. The selections don’t disappear with each search.
I know some folk have thousands of tags and being able to multi-select tags quickly like this will be very useful.
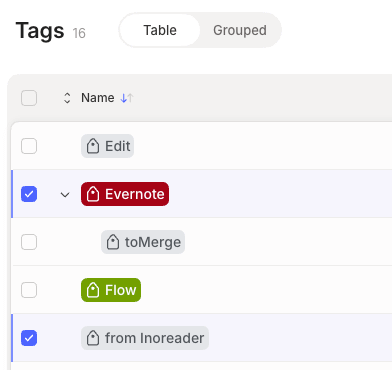
What I did here was to search for the Evernote tag, then check the select box. I then searched for from Inoreader and checked that select box.
When I switch back to view all my tags, these two are left selected.
This is much easier than it used to be.
Filtering tags in Evernote
We also have a new filter box for tags with a few new options.
Click the filter icon next to the search box and you’ll see these options.
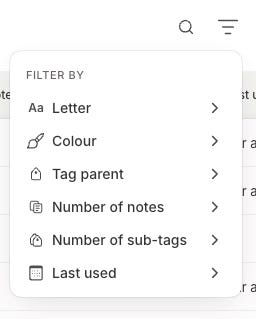
First up is filtering by letter. When you select this, you get a list of the alphabet and can pick all your tags starting with an A or T.
For those of you who use symbols at the beginning of tags, just use the search box.

In this screen grab, I’ve searched for ! and it shows my !VeryImportant tag.
Filtering by colour could be useful. I can see many folk wanting to set colours for certain types of tags or projects. For example, receipts could always be green, or a client project could be Yellow.
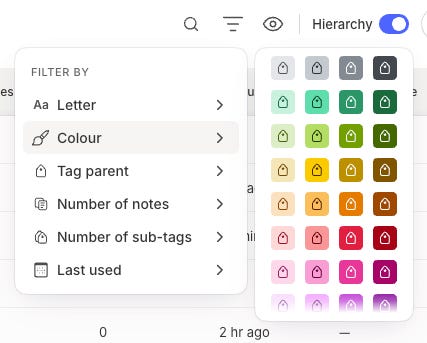
When you select a colour, it shows you the tags with that colour.
Filtering by Tag parent will show you all your top-level tags that are in a hierarchy.
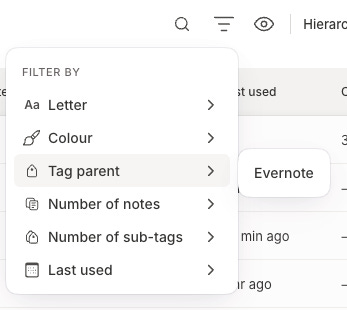
I just have one nest of tags. You can click on the top-level tag and just see the tags that are nested like this.
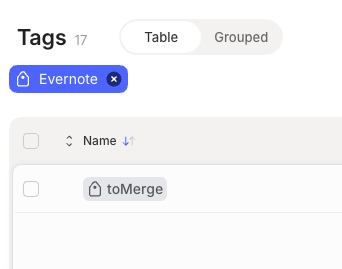
The parent tag is in blue at the top and the table view shows all the tags nested under it.
This will again be very useful for heavy taggers who use a lot of nested tags.
You can also filter by number of notes, which could be useful for some.
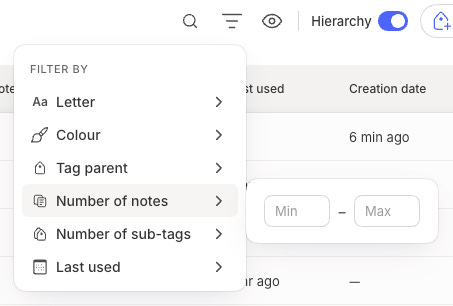
Insert some min and max note numbers to see the tags. For example, I can see all the tags that are assigned to between 10 and 20 notes.
A similar filter is available for sub-tags.
Finally, you can filter by when the tag was last used. You get a few options in the drop-down.
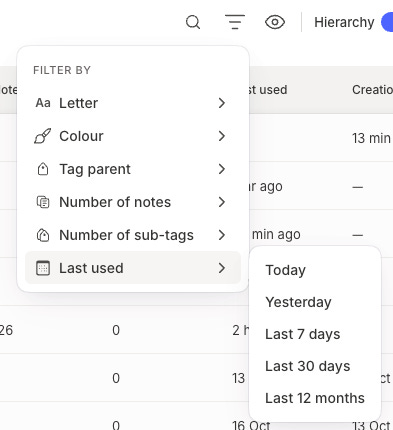
Would you like to see any more filters? Let me know in the comments.
Changing the colour of your tags
This is huge. Especially for me. I have a tag called Flow which means the note has arrived from my invoice software and I need to do something. I’ve made this red and I can really see it now.
Just click on a tag and you’ll see the colour options appear.
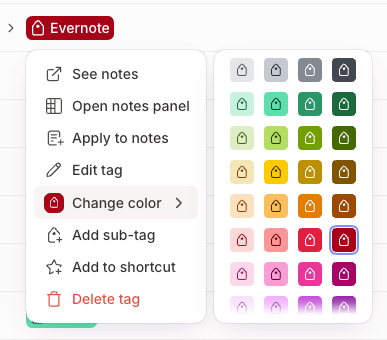
There are 48 colours to choose from and when you change a colour, it changes on all the notes with that tag, including inline tags.
I really like the idea of colour coding tags based on things like urgency or priority, type of note or client project.
My Evernote tag is green. Flow tag is red, as I really want to spot it.
The colours show in the note list, preview links, inline tags and also the note info box.
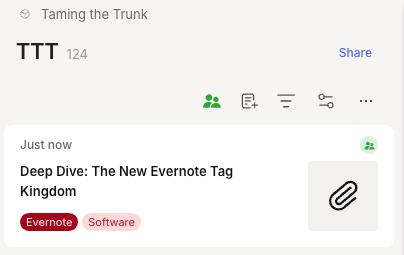
Here they are in the note list.
How will you be using coloured tags? Let me know in the comments.
Searching for tagged notes
If you’ve already been fiddling around with the new tag kingdom, you’ll have seen the new notes sidebar on the right-hand side. This opens when a tag or multiple tags are selected.
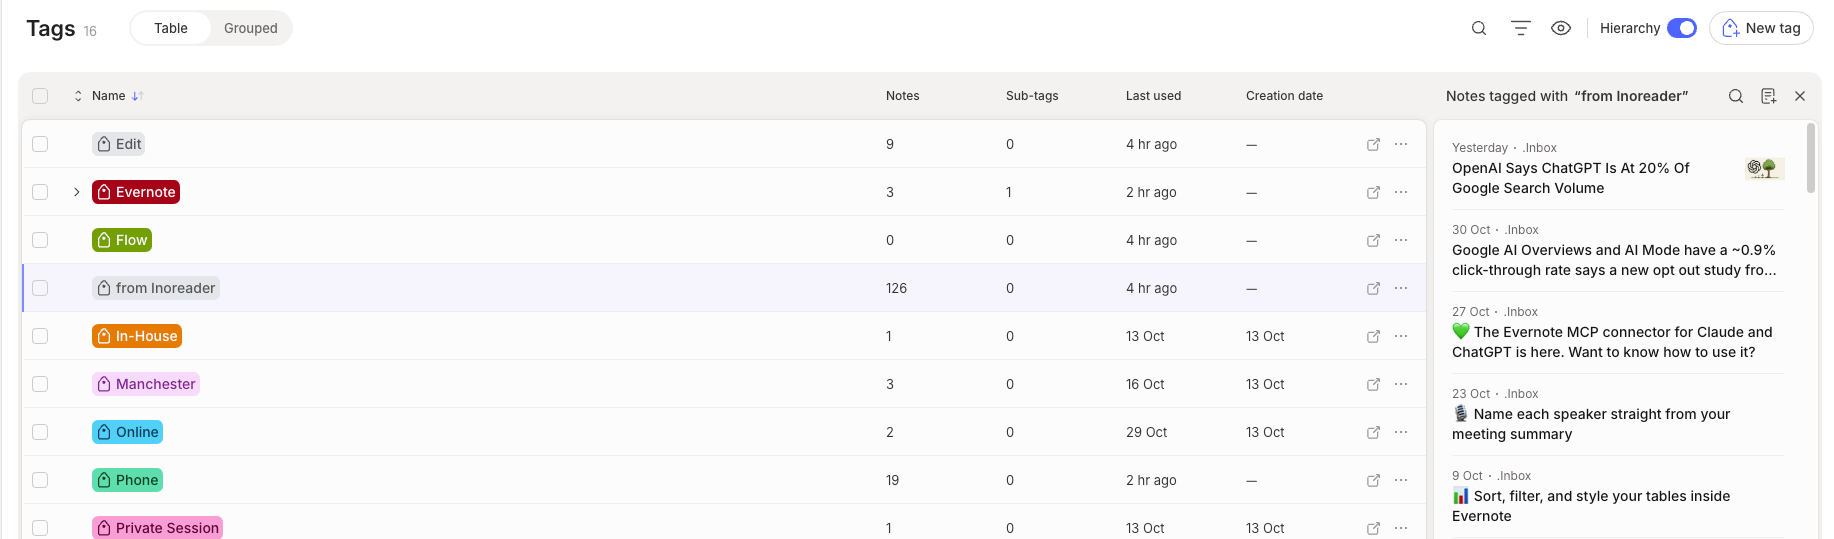
In the screenshot above, I’ve clicked on my from Inoreader tag and the sidebar on the right automatically opens and shows me all the notes with this tag.
If you use the checkboxes on the far left to multi-select tags, it will show you all the notes from these tags.
You can also double-click the space to the right of a tag to quickly select/un-select it.
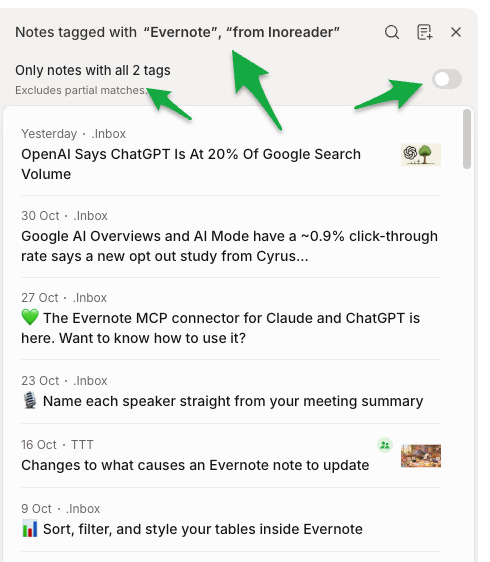
By default, this will show you notes tagged by the tags you’ve selected.
If you click the toggle for Only notes with all 2 tags then it will show notes that are tagged with all the tags that you’ve checked. For example, I may have a note that’s tagged with Evernote and from Inoreader, this note will show.
When you’ve got tags multi-selected, you’ll also see an action bar appear at the bottom of the page.

The most useful feature of this is being able to open up a filtered tag search really quickly and see the notes in the normal note list.
All this is a bit of a game changer for taggers.
It’s always been a little tricky to see all the notes with multiple tags quickly. This makes the process a lot faster.
At the top right of the sidebar, there’s a search icon where you can search the notes in the sidebar.
There’s a new note button that creates a brand new note with the tag(s) that you’ve selected.
We also get a three-dot menu for each of the notes in the sidebar that gives us the following options.
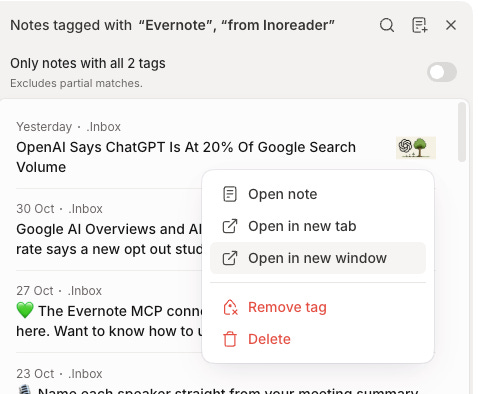
This is useful as you’ll be able to open the notes you want in a new tab and leave the tag kingdom open in another tab.
You can also right-click one of these notes and perform the usual note actions.
I like this. It speeds things up no end. Just select a bunch of tags and see the notes.
Let me know what you think in the comments.
Tag groups
Up until now, we’ve been working the Table view. We can now switch to Group view using the tab at the top left.
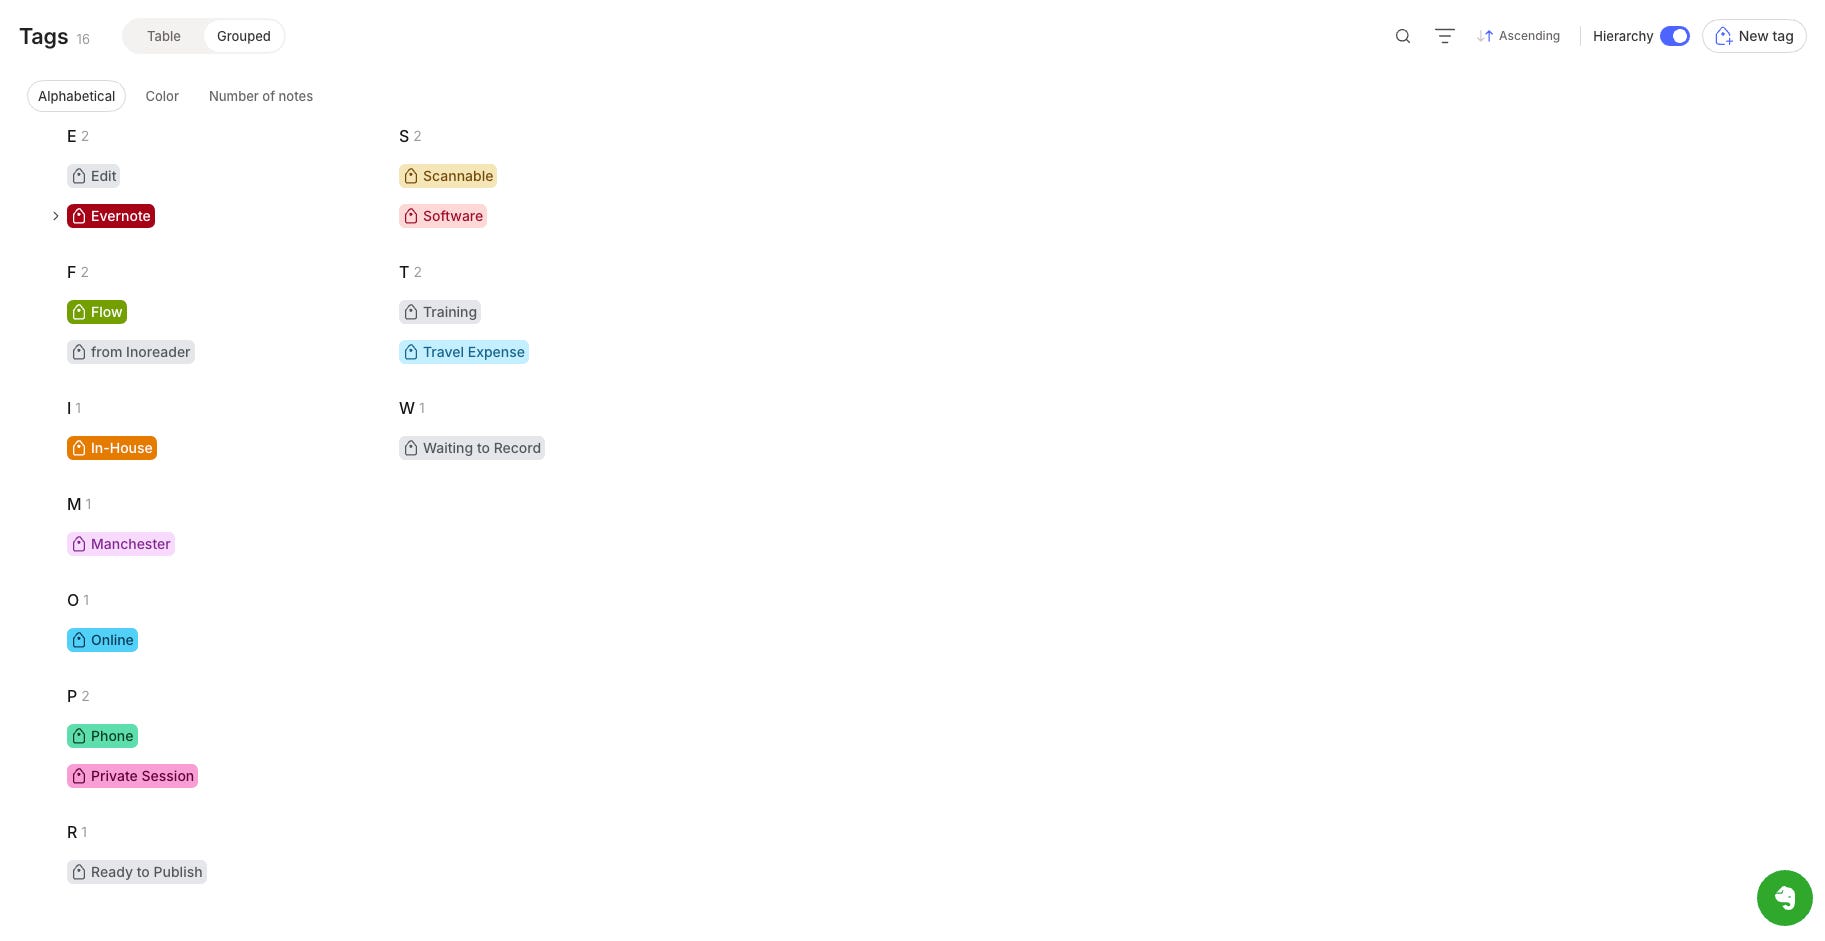
By default, this shows us all our tags in alphabetical order and they are nested.
With the Hierarchy toggle on, you still see the nests, but if you switch it off, then the view changes slightly as tags that are nested will now appear in the full A-Z list.
There are also the same filtering and searching options as the table view.
You can also group your tags by colour.
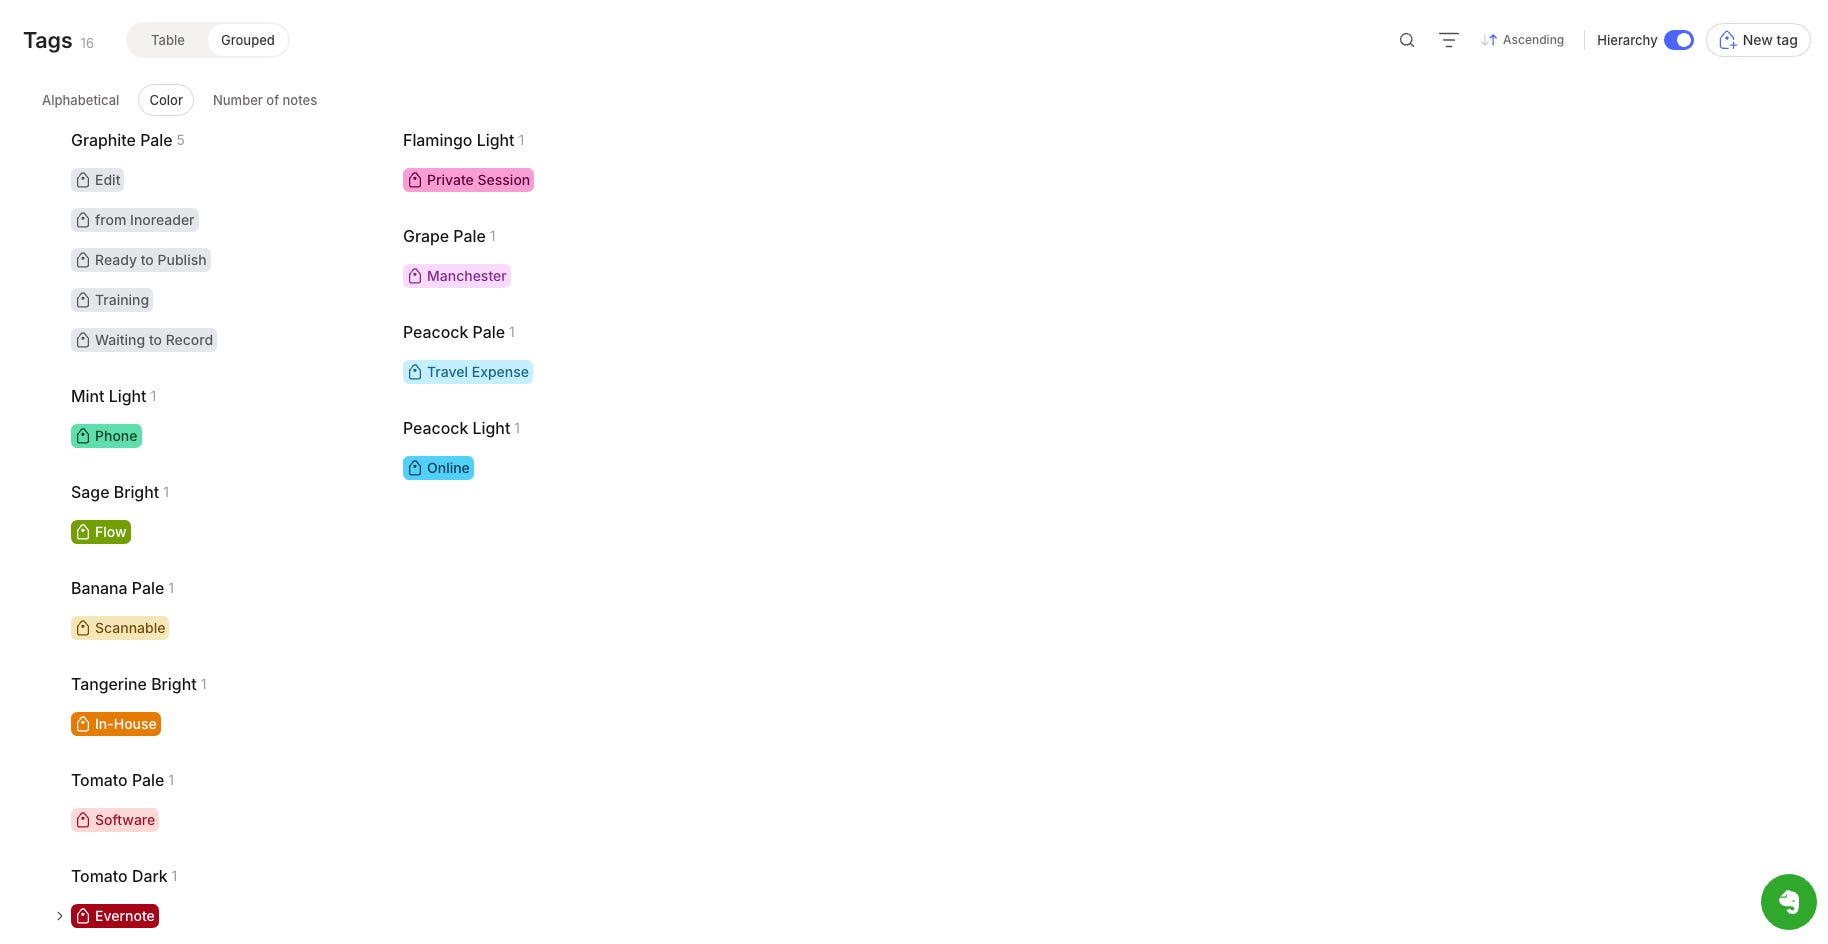
This is again useful for tag management. You can quickly see how you’ve coloured your tags and make changes if you want.
The final group is by number of notes.
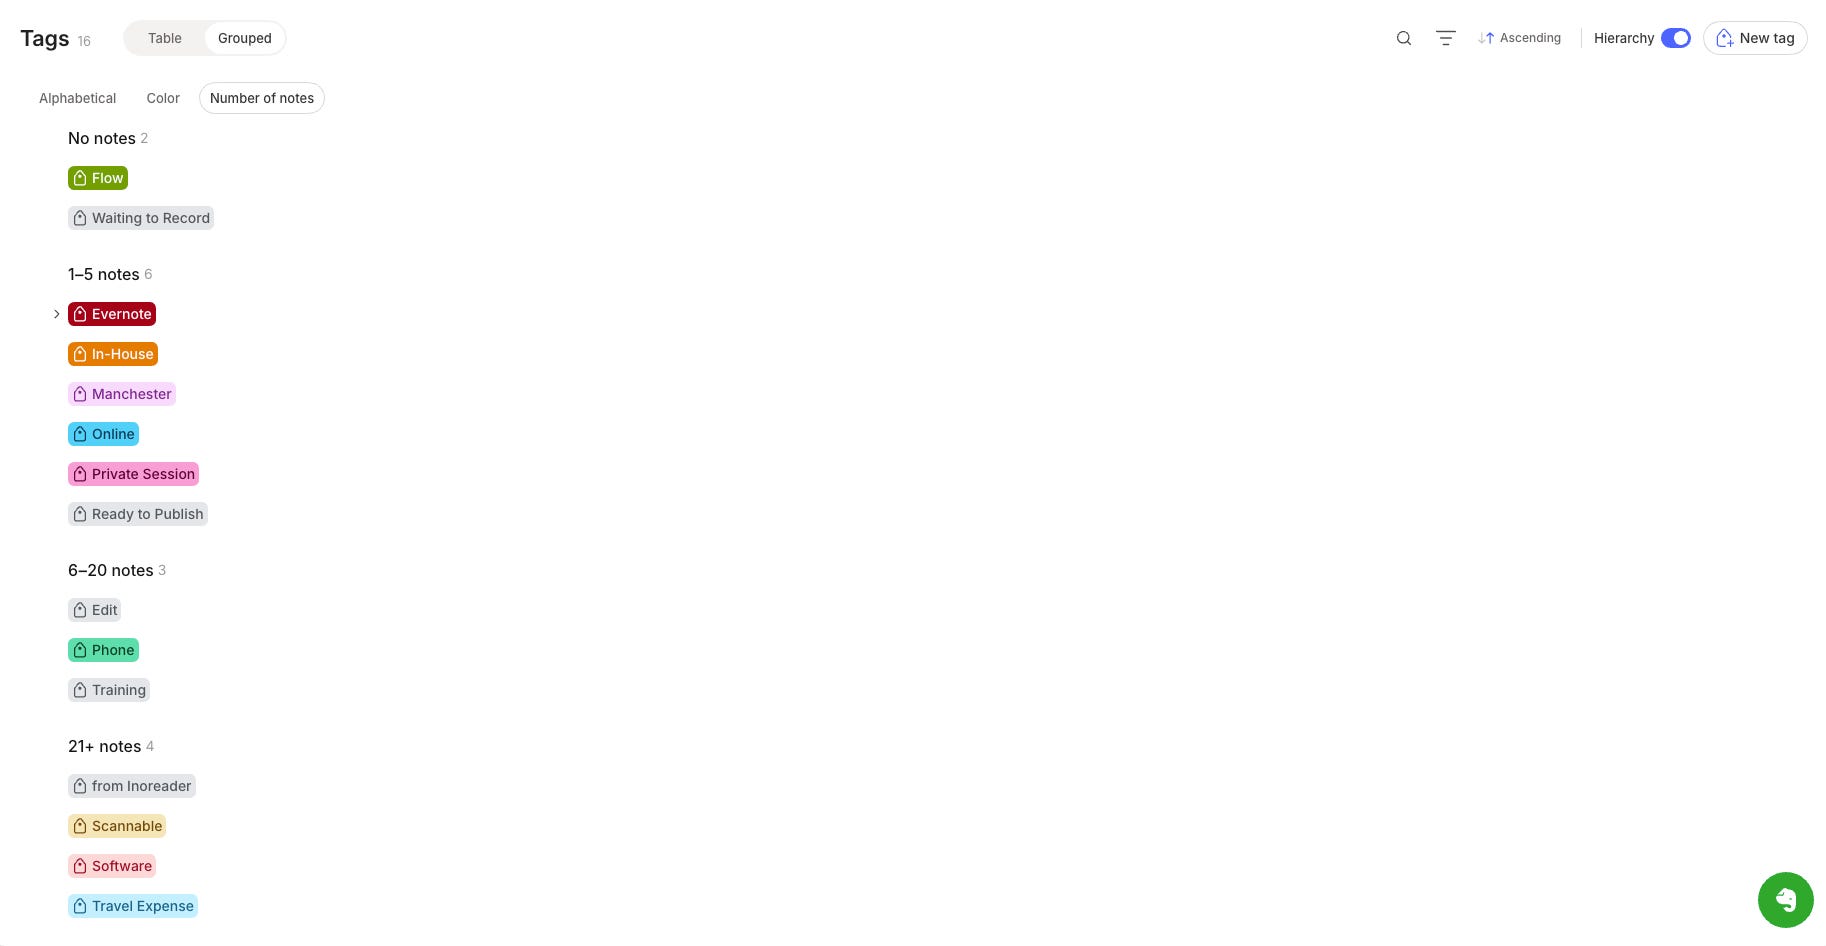
There’s a very useful No notes option right at the top so you can quickly see how many notes do not have tags.
You can switch between table and group view whenever you want.
Phew! That’s about it.
I’ve been playing around with this for a few weeks and I must admit I’m using tags more. I’ve never been a big tagger, but the option of using colours to quickly identify priorities and things that need doing is something I find very useful.
If you’re a heavy tagger, let me know what you think in the comments.
Once again, this is rolling out slowly, so it may take a week or two before everyone gets it.
Always interested in your thoughts, so leave them below.
Have a great weekend
All the best
Jon