
Taking screenshots in Evernote
I take a lot of screenshots, so here are the simplest ways to grab them straight into Evernote, plus one quick tip to keep things tidy.


A huge thank you to all paid subscribers and many thanks also to those who bought me a coffee. Taming the Trunk is 100% reader supported, no ads or commission links and your support is really appreciated.
Newsletter housekeeping: The latest version for PC & Mac is 10.155.5. You can grab it from the download page. Latest mobile version is 10.155.2.
I take a lot of screenshots. Not just for Taming the Trunk but also to send to clients, some random things I find on the web and I also take screenshots of vinyl record covers for my collection.
I tend to use either the operating systems built in screenshot app or Evernote.
Whichever way I take the shot it always ends up in Evernote where I can annotate it.
I'm not going to talk about annotation too much in this article, that's for another day.
This is just about taking the screenshot.
There's a few ways of dealing with screenshots in Evernote so here we go.
Taking screenshots with the Evernote Web Clipper
The web clipper is very cool and did you know there's screenshot functionality built into it?
The easiest way to activate the screenshot functionality is to open the web clipper and hit the screenshot button.
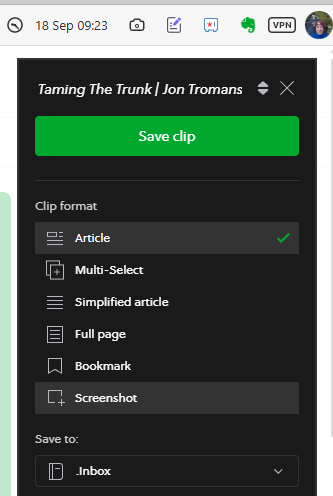
This launches the movable cross-hairs where you can select a specific area of the screen.
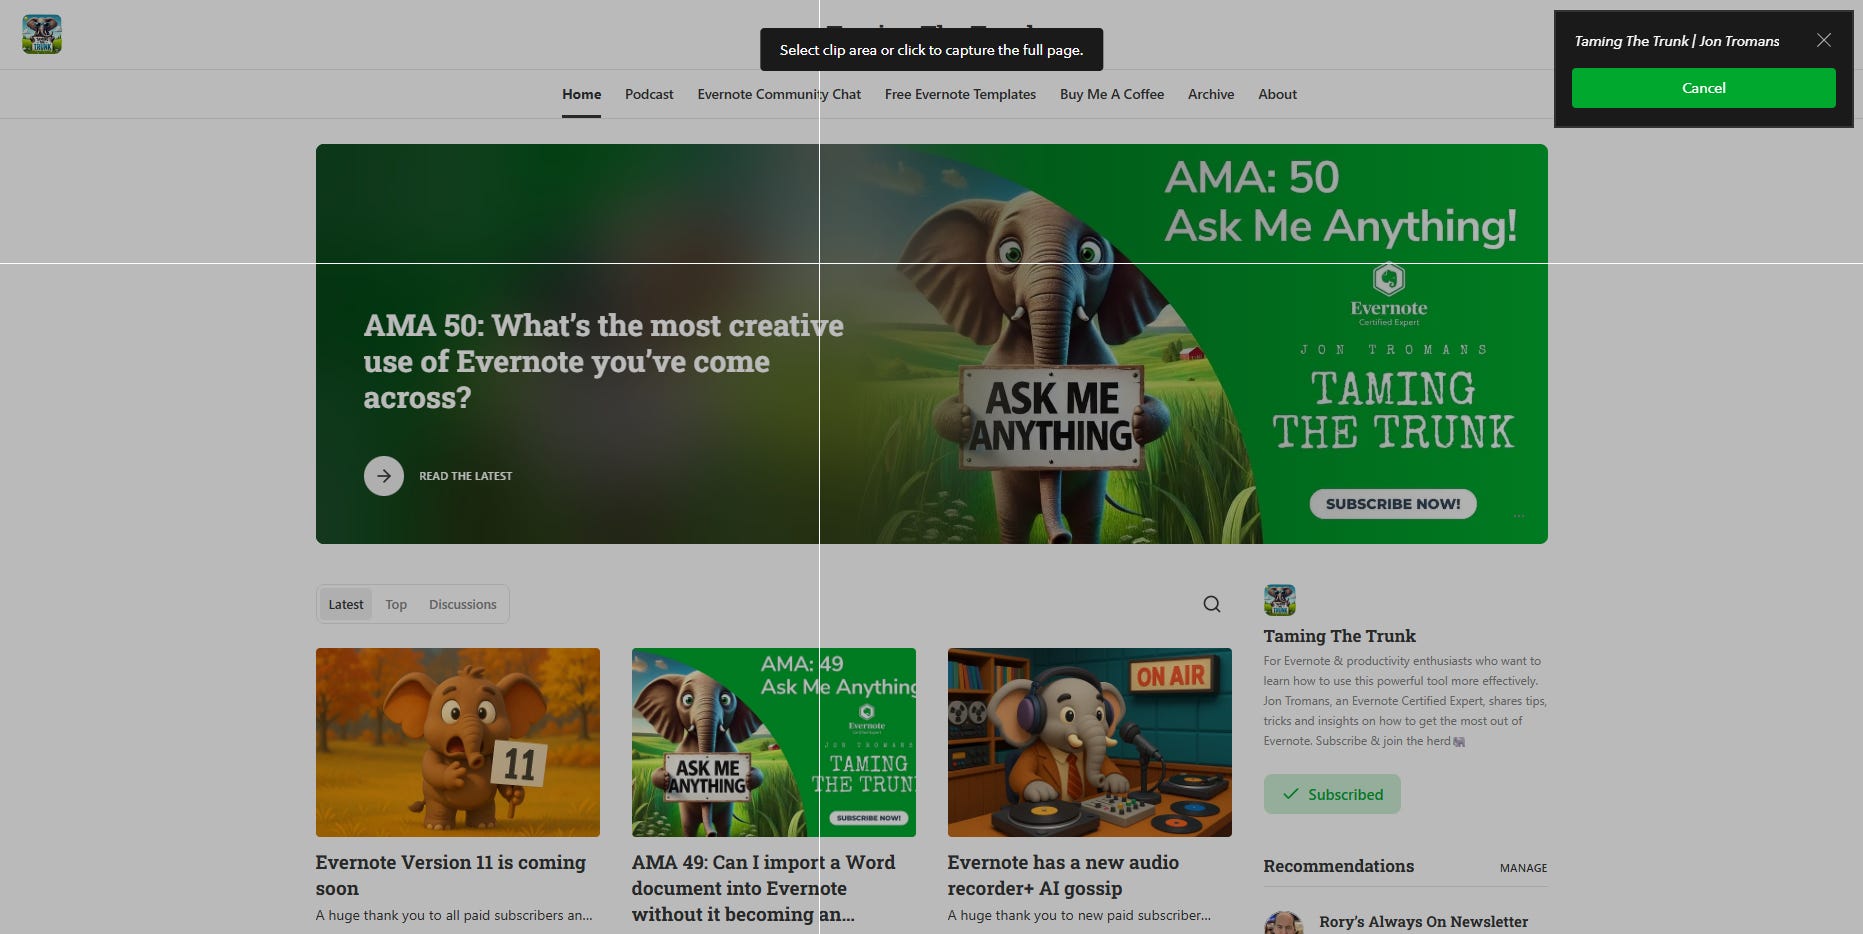
Drag your mouse to select an area and you have a screenshot ready to annotate.
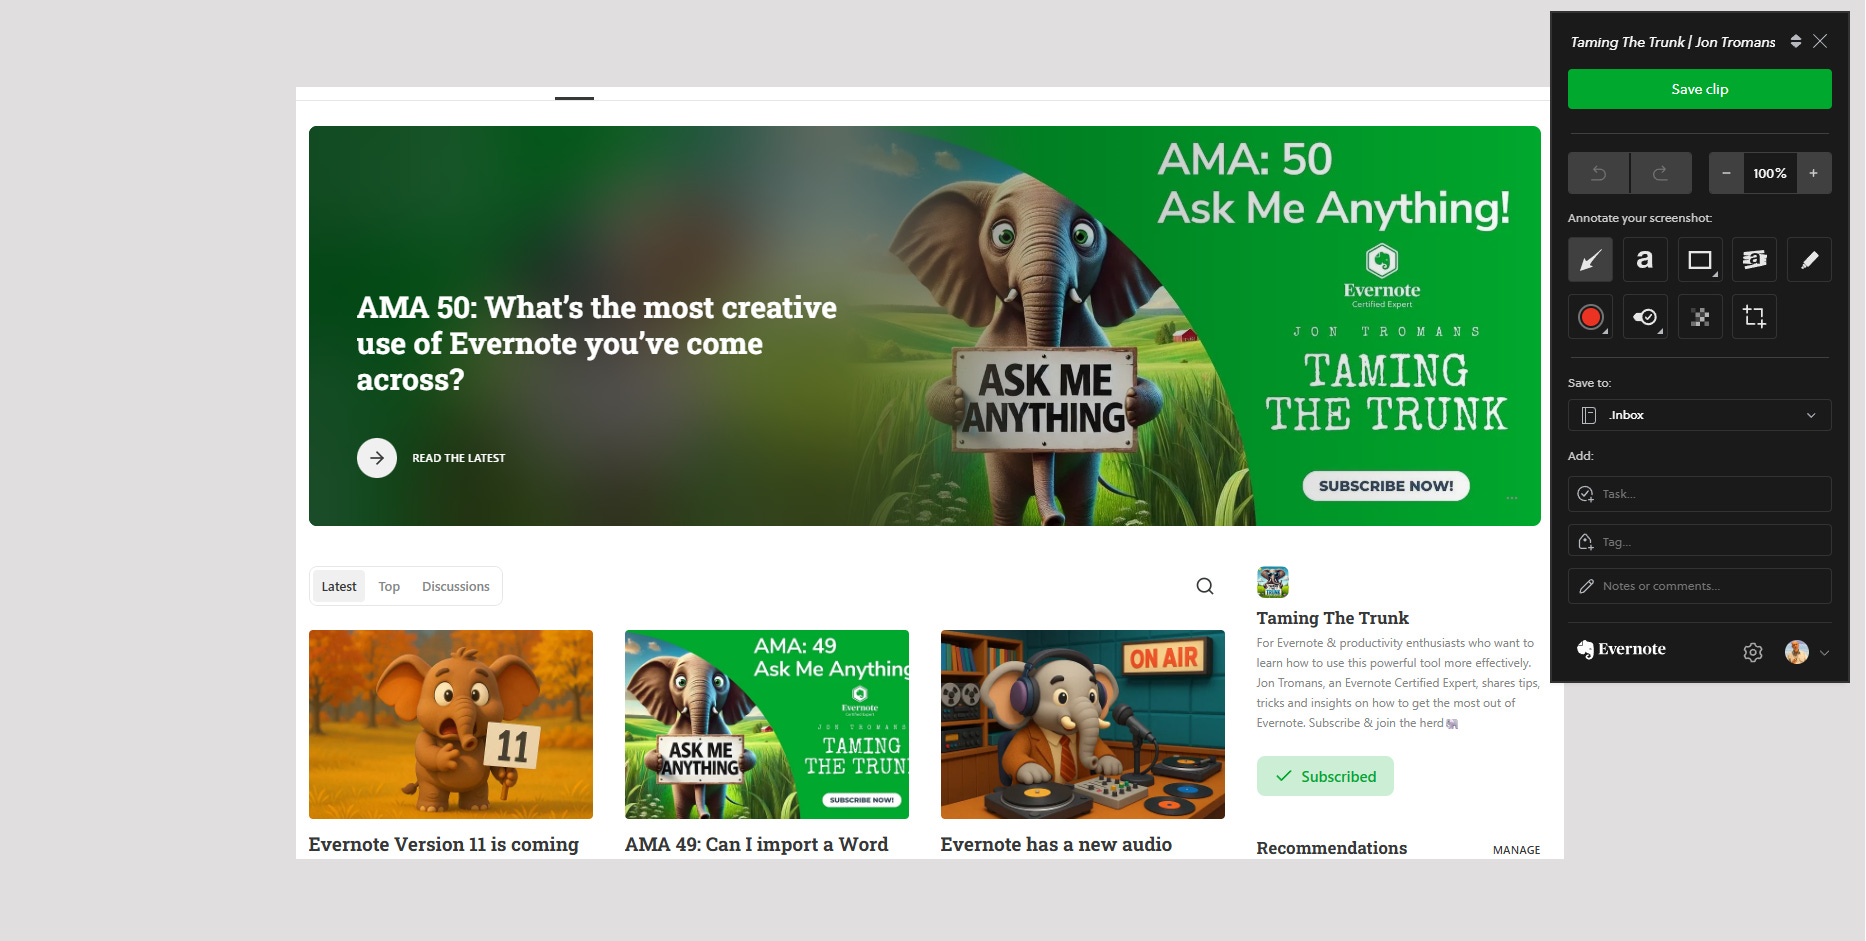
Once you've drawn all over your image you can save the clip into Evernote.
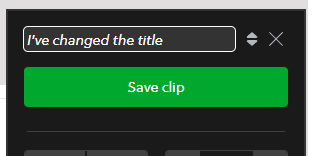
Quick Tip: You can click the note title at the top of the web clipper and rename it to whatever you want.
I use the web clipper a lot for taking screenshot but it is restricted to web pages within your browser.
There's also some excellent keyboard shortcuts to get to the screenshot function quickly.
On both Windows and Mac press ` and then m and the clipper will open and cross-hairs appear.
Taking screenshots with the Evernote Windows app
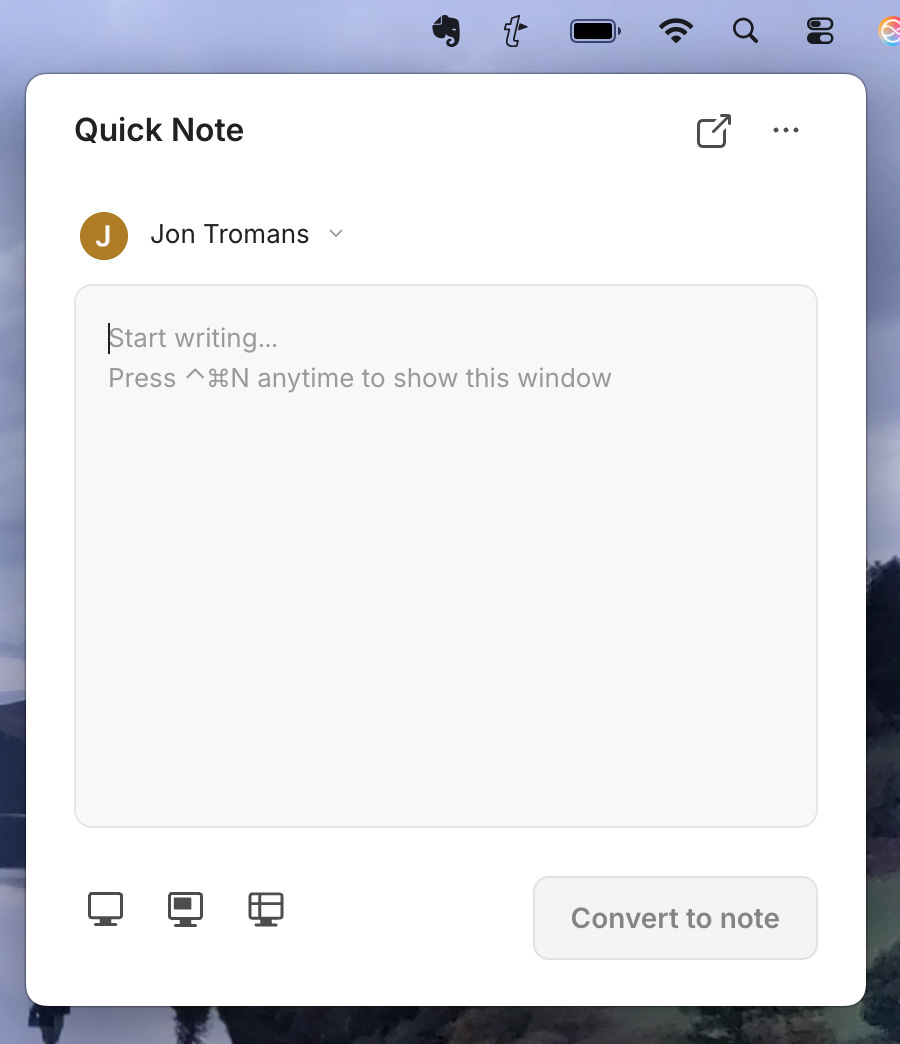
The Evernote desktop app comes with a helper. It’s the little elephant that sits in the task bar. You can use it to take quick notes.
Give it a click.

Down the bottom left, there's a little screenshot icon.
I don't have a Windows 10 machine around anymore, but as far as I can remember this works in Windows 10 but not in Windows 11 because Microsoft takes control of the screenshot function.
Evernote know about this and I hope they’ll find a workaround.
My own workaround is as follows.
Activate the built in Windows screenshot function using WIN KEY + SHIFT + S.
This should automatically save any screenshots to the Pictures folder on your PC. It may be under a sub folder called Screenshots. You can also set whatever folder you want in the Windows screenshot settings.

Now open Evernote and head into settings and create a Sync Folder that will send anything saved in your screenshot folder into Evernote.
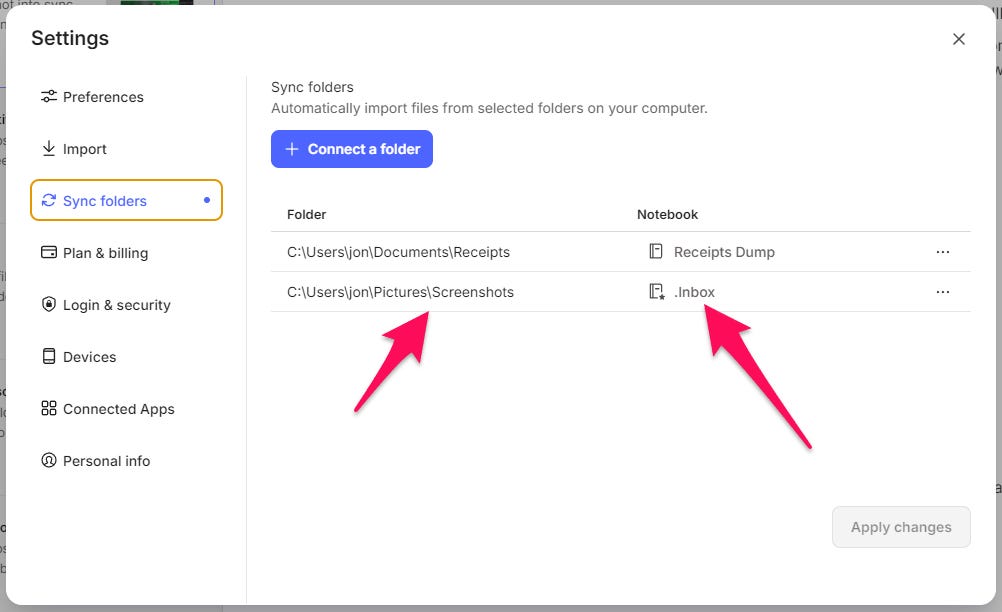
You can pick whatever notebook you want for storing screenshots.
After you've taken your screenshot just open Evernote and you can annotate it however you want.
This is how I work when I'm on my main Windows PC.
Taking screenshots with the Evernote Mac app
Things work slightly differently on the Mac app and it’s a bit smoother.
You get the same elephant helper icon in the task bar but when you click on it there are slightly different options than on Windows.
From left to right, the icons stand for:
Take a screenshot
Take a screenshot of a window
Take a screenshot of a selected area
Once you've taken the screenshot, the image will automatically appear in your default notebook.
If you want to save the screenshot to a different Evernote notebook then you can use the Macs built in screenshot app and save it to a synced folder as explained above.
Taking screenshots with the Evernote iPhone & Android app
There's no screenshot button in the Evernote phone apps so you'll need to use the built in screenshot feature and then share the image to Evernote.
Once you've got the image into the app, you can open it and annotate it on the phone apps.

Pretty much all the annotation features from the desktop apps are available on mobile.
So that's how I use my Evernote for taking screenshots.
How do you use yours? Do you use other apps for screenshots and why? Let me know in the comments.
And finally…
Evernote have launched a new satellite website called Word Counter which kind of counts words, and a lot more.
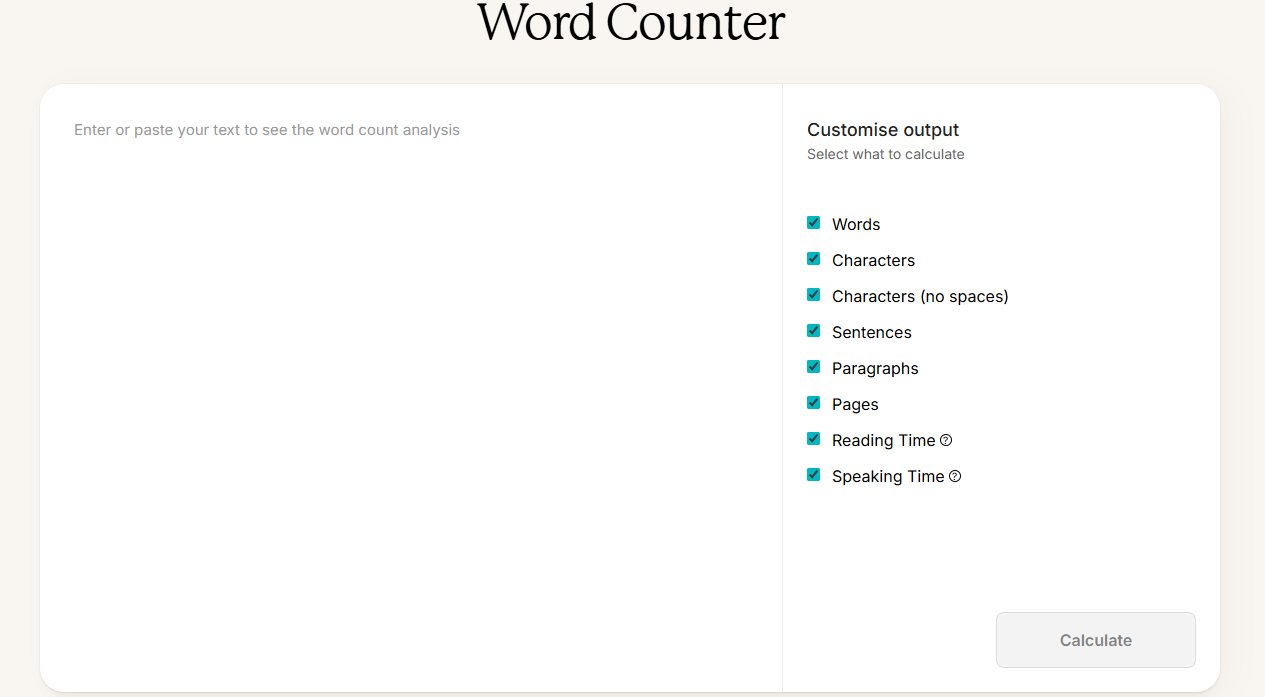
They use these standalone websites to test ideas and some of them may or may not end up in the app itself.
Have a play and let me know what you think in the comments. Would you like to see any of this in the app?
Have a great weekend
All the best
Jon
I use Alt+Ctrl+S for all of my screenshots, automatically puts into a new note in Evernote>
Thanks for so, me more usefuil reminders about EB's little features. I'd overlooked that the web clipper allowed you to take screenshots and annotate them 0 I'll be making more use of that in the future.
Something else that I've only recently noticed on my deskyop is that on the display of Tasks, where I use the "Today" option, against each of the headings (Today, Tomorrow, Next 7 days) there's a "+" sign which allows you to create a new task in that section, and under the "Notes" list within the Task section you have similar functuinality against each note - all this meaning youdon't have to go across to the Rask button in the sidebar.
I can see that the latest standalone tool, the Word Counter, being useful. I like the fact that you can select different options for the calculate process to work on. Just a shame it's standalone and you can't call it from within EN - but who knows what v11 will offer?